TL;DR: To change the DNS server on Windows 11, open Settings > Network & internet, pick Wi-Fi or Ethernet, select Edit next to DNS server assignment, switch it to Manual, turn on IPv4, type a preferred and alternate DNS address (for example 1.1.1.1 and 1.0.0.1), optionally turn on DNS over HTTPS, and select Save. You can also do it from Control Panel, Command Prompt or PowerShell, and you can switch back to Automatic (DHCP) at any time.
Knowing how to change DNS server on Windows 11 is one of those small skills that can fix stubborn “site can’t be reached” errors, add a layer of privacy with encrypted lookups, or block known malicious domains before they load. DNS (the Domain Name System) is the internet’s phone book: it turns a name like teckhustlers.com into the IP address your PC actually connects to. By default, Windows uses whatever DNS server your router or internet provider hands out. This guide shows four ways to change it, which public DNS servers to consider and how to undo everything if something goes wrong.

Before you start: what you’ll need
- A Windows 11 PC and an account with administrator rights (needed for the command-line methods).
- The DNS addresses you want to use (see the table below).
- A note of your current settings. Cloudflare’s own setup guide recommends writing down any DNS addresses you’ve already set, so you can restore them later.
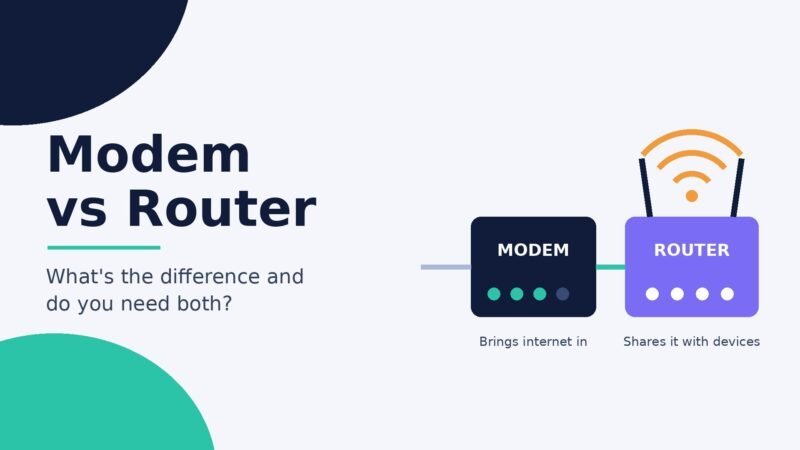
If you’re not sure how your home network is set up, our explainer on modem vs router covers where DNS settings usually come from.
Popular public DNS servers
| Provider | Preferred (IPv4) | Alternate (IPv4) | Good to know |
|---|---|---|---|
| Cloudflare 1.1.1.1 | 1.1.1.1 | 1.0.0.1 | Supports DNS over HTTPS and DNS over TLS |
| Cloudflare for Families (malware blocking) | 1.1.1.2 | 1.0.0.2 | Blocks known malware domains |
| Cloudflare for Families (malware + adult content) | 1.1.1.3 | 1.0.0.3 | Adds adult-content filtering |
| Google Public DNS | 8.8.8.8 | 8.8.4.4 | Widely used, supports encrypted DNS |
| Quad9 | 9.9.9.9 | 149.112.112.112 | Blocks domains flagged as malicious |
| OpenDNS | 208.67.222.222 | 208.67.220.220 | Run by Cisco, offers filtering options |
Cloudflare’s addresses come from its Windows setup documentation; Google’s are listed on the Google Public DNS site, and Quad9’s on Quad9’s service page. Any speed or privacy claims are the providers’ own, so it’s worth trying one and seeing how it performs on your connection.
Method 1: Change DNS in Windows 11 Settings (easiest)
This is the method Microsoft documents and the only one that exposes DNS over HTTPS in a simple menu.
- Open Start > Settings > Network & internet.
- Select Ethernet or Wi-Fi. For Wi-Fi, open your connected network’s properties or Hardware properties.
- Next to DNS server assignment, select Edit.
- Change the drop-down from Automatic (DHCP) to Manual.
- Turn on the IPv4 toggle.
- Type your chosen addresses in Preferred DNS and Alternate DNS.
- Optionally set DNS over HTTPS (explained below).
- Repeat for IPv6 if your provider lists IPv6 addresses, then select Save.
Should you turn on DNS over HTTPS?
DNS over HTTPS (DoH) encrypts your lookups so other people on the network can’t easily read or tamper with them. Microsoft’s support page lists these choices:
- Off: queries are sent unencrypted.
- On (automatic template): queries are encrypted using Windows’ built-in template for that server.
- On (manual template): queries are encrypted using a template URL you type in from your DNS provider.
- Fallback to plaintext: when on, Windows sends an unencrypted query if HTTPS fails; when off, the query isn’t sent at all.
For most people, picking a well-known provider and choosing On (automatic template) is the simplest secure option. Microsoft notes the DNS over HTTPS setting is not available in Windows 10.
Method 2: Use Control Panel (classic way)
- Press Win + R, type
ncpa.cpland press Enter to open Network Connections. - Right-click your Wi-Fi or Ethernet adapter and choose Properties.
- Select Internet Protocol Version 4 (TCP/IPv4) and click Properties.
- Choose Use the following DNS server addresses, enter the preferred and alternate servers, then click OK.
This works fine, but as Windows Central points out, it doesn’t offer the DNS over HTTPS option.
Method 3: Command Prompt with netsh
Open Command Prompt as administrator and first list your adapter names:
netsh interface show interface
Then set the DNS servers, replacing “Wi-Fi” with your adapter name:
netsh interface ip set dns name="Wi-Fi" static 1.1.1.1netsh interface ip add dns name="Wi-Fi" 1.0.0.1 index=2
Method 4: PowerShell
In an administrator PowerShell window, find your adapter with Get-NetAdapter, then run:
Set-DnsClientServerAddress -InterfaceAlias "Wi-Fi" -ServerAddresses ("1.1.1.1","1.0.0.1")
To undo it and go back to your router’s DNS:
Set-DnsClientServerAddress -InterfaceAlias "Wi-Fi" -ResetServerAddresses
Check that it worked
- Run
ipconfig /allin Command Prompt and look for the DNS Servers line under your adapter. - Run
ipconfig /flushdnsto clear old cached lookups so the new server is used right away. - In Settings, your adapter’s properties should show the new servers, marked “(Encrypted)” if DoH is on.
Windows Central notes the change usually applies immediately, but a restart may be needed in some cases.
Troubleshooting common problems
| Problem | What to try |
|---|---|
| No websites load after the change | Double-check for typos, or switch back to Automatic (DHCP) |
| DoH option is greyed out | Use a provider Windows recognizes or choose the manual template |
| Work laptop resets your DNS | Your organization likely manages it; ask IT before changing it |
| Some sites still fail | Flush the cache with ipconfig /flushdns and restart the browser |
If the real problem is a connection that keeps dropping, see our guide to Wi-Fi that keeps disconnecting on Windows 11. You may also find how to find your IP address and how to find a Wi-Fi password on Windows 11 handy while you’re in network settings.
The bottom line
Changing your DNS server on Windows 11 takes about a minute in Settings, and it’s fully reversible. Pick a reputable public resolver, turn on DNS over HTTPS if you want encrypted lookups, flush the DNS cache and confirm the change with ipconfig /all. If anything breaks, switching back to Automatic (DHCP) restores your original setup.
Sources
- Microsoft Support: Essential network settings and tasks in Windows
- Cloudflare: Set up 1.1.1.1 on Windows
- Google Public DNS: Get started
- Quad9: Service addresses and features
- Windows Central: Ways to set DNS settings on Windows 11

The Teck Hustlers Editorial Team covers technology, business, finance and gaming news for readers who want the story behind the headline. Every article is researched, written and edited by our in-house team, checked against company announcements, filings and reputable reporting, and updated when new facts emerge. We focus on what each development means for founders, professionals, investors and everyday users. Have a tip or a correction? Reach us through our contact page.