Blacked-out text, like a hidden treasure waiting to be discovered, often sparks our curiosity. Have you ever stumbled upon a document or a message with sections of text covered in black ink, leaving you wondering what secrets lie beneath?
Well, you’re not alone. Uncovering hidden text becomes a thrilling journey of exploration and discovery in a world where information is sometimes intentionally obscured. In this comprehensive guide, we will delve into the fascinating world of how to uncover blacked-out text. So, buckle up and get ready for an enlightening adventure!
However, there may be instances when you need to uncover that obscured text. To uncover blacked-out text in a photo, you can utilize photo editing software like Photoshop.By using tools such as the Clone Stamp or adjustment layers, you can sometimes make poorly applied or semi-transparent black marks less effective, but if the black box fully overwrote the pixels, no tool can bring the original text back.
Uncovering blacked-out text often involves dealing with all the visual layers that might obscure information.
“Photoshop provides powerful tools that can help you analyze and enhance images, but they only work when some trace of the original text is still present.”
. This article delves into various methods and tools available on the iPhone that can help you see through the black marker and reveal the hidden text beneath.
To uncover hidden messages within an image, you can try altering the hue and saturation levels. By adjusting these settings, hidden messages that may be camouflaged within a jumble of colors can be revealed. Additionally, on iPhones, hidden text under “Invisible Ink” can be easily unveiled by holding down on the message and selecting the “Invisible Ink” option. This simple trick allows the concealed message to magically appear before your eyes, making hidden content visible in an instant. We’ll explore built-in iOS tools, third-party apps like Snapseed, and best practices for both revealing and protecting redacted information.
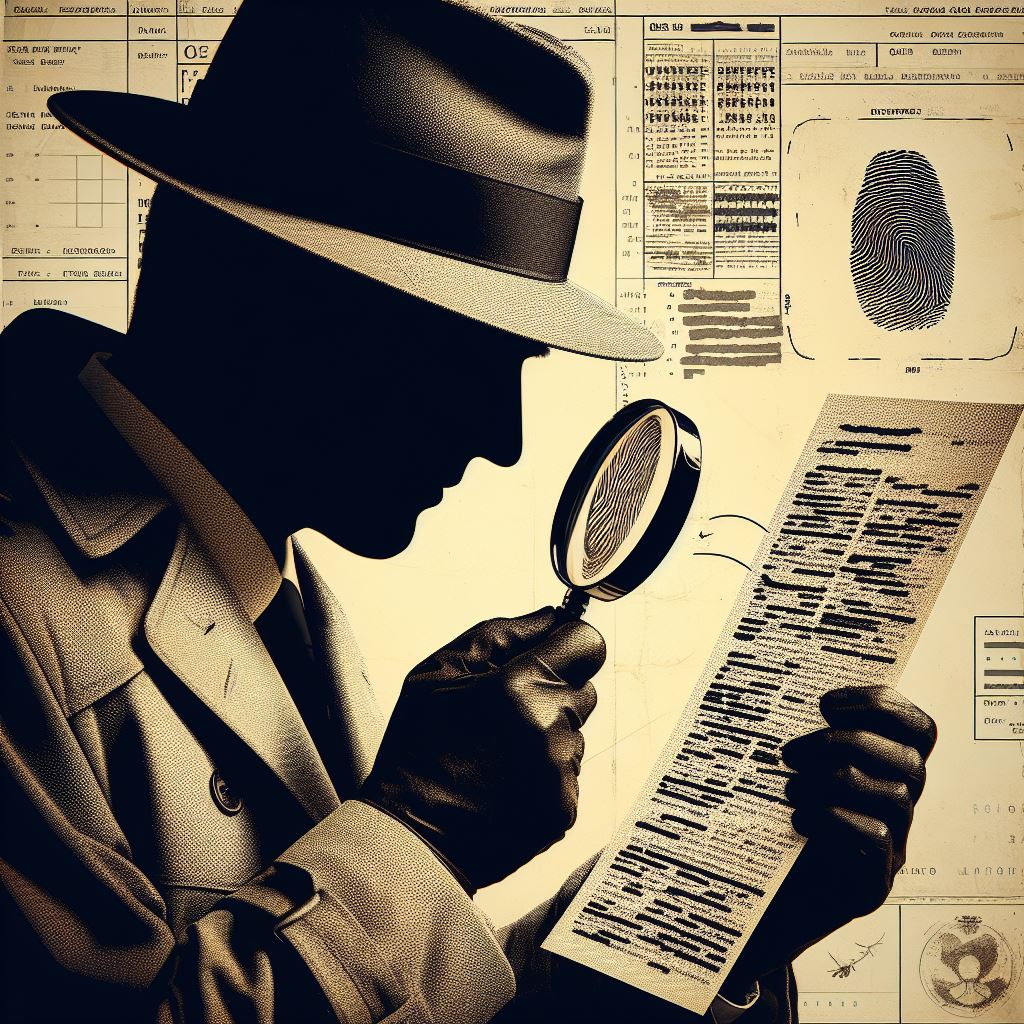
Before we dive into the methods of uncovering blacked-out text, let’s first understand what it is and why it exists. The blacked-out text refers to sections of text that have been intentionally obscured or concealed, usually by covering them with a black marker or digitally blocking them out. This can occur in various contexts, such as legal documents, classified information, or personal messages.
In some high‑profile cases, supposedly redacted PDFs have turned out to be only visually masked. Black bars were drawn on top of live text instead of actually deleting it. In these documents, anyone can highlight the blacked‑out area, copy it, and paste it into a new file to reveal the “hidden” words. This is not hacking; it is a basic redaction mistake where the black box is just a shape sitting over the original text layer. Proper PDF redaction removes the underlying text completely so it cannot be recovered by copy‑and‑paste or simple editing.
Blacking out text serves several purposes, including protecting sensitive information, preserving privacy, or complying with legal requirements. However, it also fuels our natural curiosity, making us eager to uncover hidden secrets.
How To Uncover Blacked Out Text on iPhone
Using Invisible Ink on Messages
If you’ve ever received a message on your iPhone with parts of it hidden under the guise of “Invisible Ink,” you might wonder how to reveal the concealed text. It’s simple! Hold down on the message containing the hidden text and tap “Invisible Ink.” Voila! The hidden message will magically appear before your eyes.Invisible Ink is designed to be revealed by the recipient, so it is not a security feature or a true redaction method.
Removing Pen Marks from Screenshots
Sometimes, you might come across screenshots with pen marks or highlights obscuring certain parts of the text.
But fear not! You can try using editing software like Photoshop or online tools like Pixlr to weaken or adjust these marks. In some cases, especially when the pen or highlighter was not fully opaque, tweaking brightness and contrast can make the underlying text more visible, but solid, opaque strokes usually cannot be undone.
How To Uncover Blacked Out Text on Android
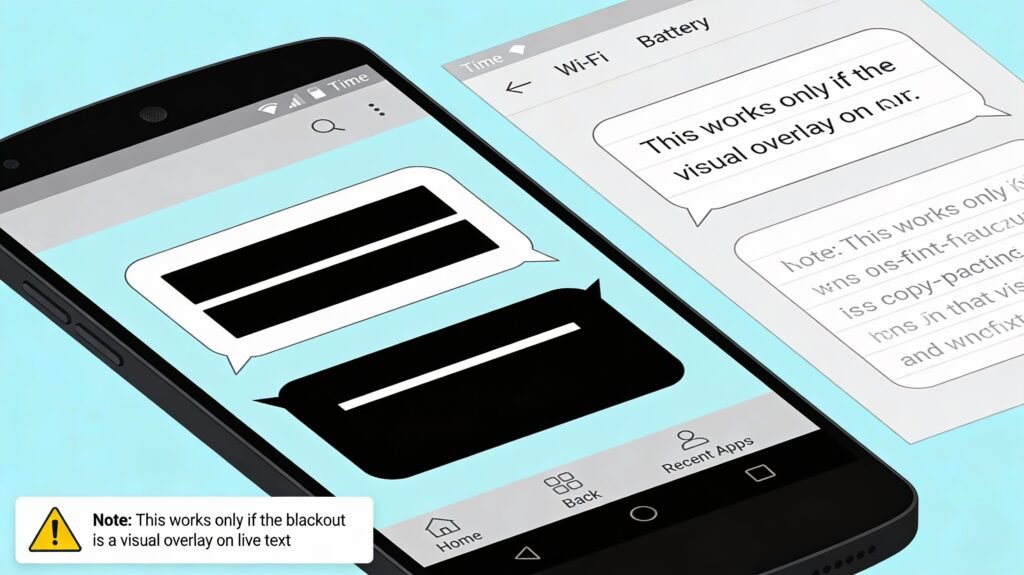
Copying and Pasting Blacked-Out Text
If you encounter blacked-out text in messages or documents on Android devices, you can try a simple yet effective method: copying and pasting. Highlight the blacked-out text, copy it, and paste it into a notes app or text editor. This only works when the blackout is just a visual style or overlay on live text (for example, a dark background or a bad PDF redaction); if it is a screenshot or image where the text has been painted over, copying and pasting will not reveal anything.
Using Text Editors for Analysis
Text editors like QuickEdit can also be useful tools for uncovering blacked-out text on Android devices. By pasting the blacked-out text into a text editor, you can analyze it more closely and uncover hidden messages or information.
Uncovering Blacked Out Text on Social Media Platforms
Instagram Investigations
On Instagram, you may come across posts or messages with blacked-out text, either as a form of creative expression or to hide certain information. If you’re curious about what lies beneath the black bars, try taking a screenshot of the post and adjusting your phone’s brightness and contrast settings. Sometimes, this simple trick can reveal the hidden text.
Snapchat Sleuthing
Similarly, on Snapchat, you might encounter messages with blacked-out text. To uncover the hidden messages, take a screenshot of the conversation and adjust your device’s brightness/contrast settings. Try copying and pasting the text into a notes app if that doesn’t work. You might be surprised by what you uncover!
Uncovering Blacked Out Text in PDF Documents
PDF Puzzles
In digital documents, such as a PDF document, blacked‑out text is common, especially in legal or sensitive files. Sometimes these “redactions” are done incorrectly, and the black bars only hide the text visually without actually removing it from the PDF. Before you try advanced tools, it is worth testing whether the blackout is real or just a cosmetic layer.
Simply drag to select the “blacked‑out” area and copy–paste it into a text editor or Word document. If the pasted result shows the underlying words, the PDF was never properly redacted and the black bars are just shapes drawn on top of live text. This is a redaction failure in the document, not a hack, and it happens when editors mask text instead of deleting it from the PDF’s content layer.
If selecting and copying does not reveal anything, the file may be a scanned image of a document with black boxes, which is where OCR can sometimes help.
Using OCR to Extract Visible Text
If you need to work with a scanned PDF that contains blacked‑out areas, you can use Optical Character Recognition (OCR) tools to convert the visible parts of the scanned document into editable text. Tools like Adobe Acrobat or online services like Free Online OCR can help you extract faint or low‑contrast text that was not completely obscured.
However, OCR cannot recover text that has been properly removed or completely covered in the scan. If the blacked‑out region is truly opaque in the image, there is no underlying character data for OCR to detect, and the concealed information will remain hidden no matter how many times you scan it.
Because of this, anyone creating redacted PDFs should always test their files the same way an attacker would: try selecting, copying, and searching near the redacted areas to confirm that no sensitive text survives under or around the black boxes.
Understanding the Basics of Photo Editing on iPhone
Adjusting Image Settings for Clarity
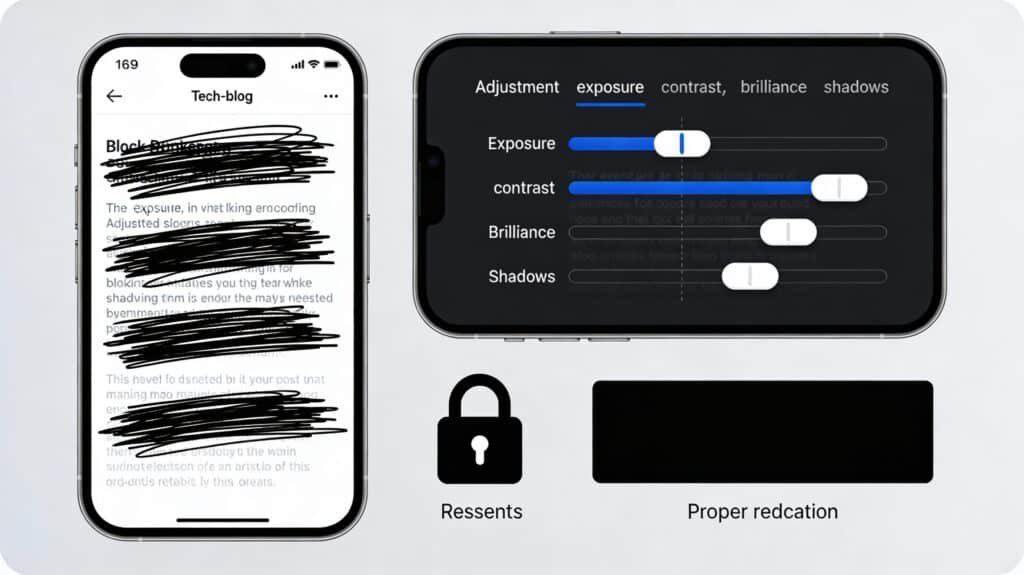
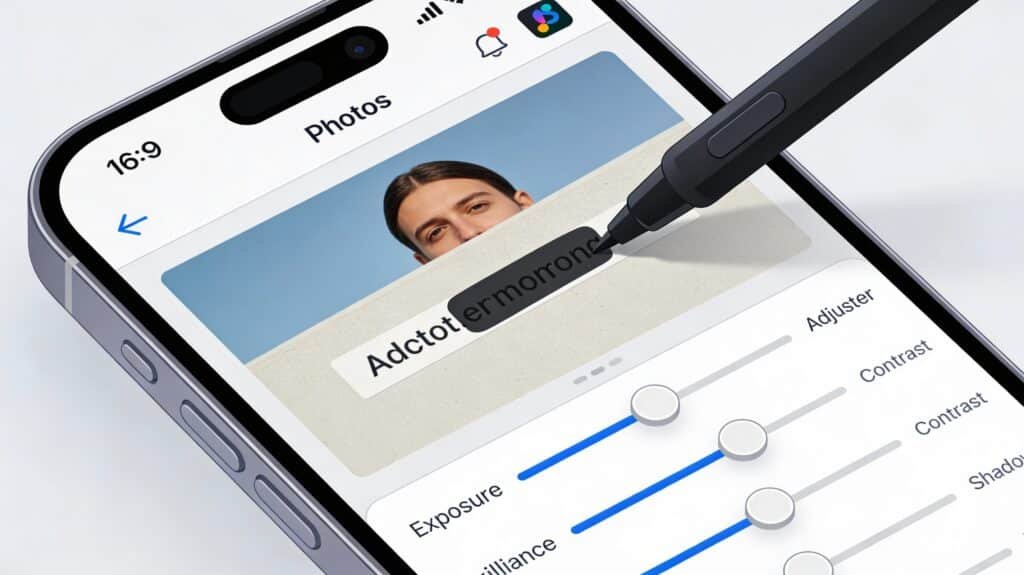
To enhance the clarity of an image on your iPhone, especially when attempting to uncover blacked-out text, certain photo editing settings are key. Adjusting these settings can sometimes reveal details that were obscured by a marker. Here’s a brief guide on what settings to tweak:
- Exposure: Increase the exposure to brighten the image, which may make the underlying text more visible.
- Brilliance: Adjusting brilliance can affect the image’s highlights and shadows, potentially exposing hidden details.
- Contrast: Lowering the contrast can reduce the stark difference between the blacked-out areas and the surrounding text.
- Shadows: Lightening the shadows might reveal information that was covered by the marker.
Enhanced screen visibility not only improves user experience but can also be crucial when trying to view obscured content. Precise adjustments in photo editing can sometimes reveal underlying content that was not initially visible.
When attempting to uncover text, start with the highest quality image possible. This often means using the best camera settings available on your iPhone. For instance, enabling Apple ProRAW on newer models can provide greater detail in your photos, which is beneficial for editing. Additionally, experimenting with different combinations of settings is essential, as the effectiveness of these adjustments can vary depending on the extent of the black marker used.
Using Built-in iOS Photo Editing Tools to Enhance Photos
The iPhone’s Photos app comes with an array of built-in tools that can be surprisingly effective for photo editing tasks, including attempts to uncover blacked-out text. Can sometimes make what looks like solid marker strokes behave more transparently, especially when the mark was created with a semi‑transparent digital tool like iOS Markup. allowing for the possibility of revealing underlying details.
- Open the photo in the Photos app and tap Edit.
- Use the Adjustment Tools to tweak exposure and brilliance levels.
- Modify Highlights and Shadows to discern details obscured by the marker.
- Adjust Contrast to further clarify the image.
While these tools are straightforward, they can be quite powerful when used correctly. However, it’s important to note that the effectiveness of these methods can vary greatly depending on the quality of the original redaction. If the text has been thoroughly obscured, even the best adjustments may not reveal the hidden information.
Editing techniques on the iPhone can make it possible to see through mistakes made when hiding personal information in images. Therefore, it’s essential to use secure methods when blocking out text to prevent sensitive data from being exposed.
Limitations of Photo Editing for Revealing Text
While photo editing on an iPhone offers various tools to adjust image settings, the ability to uncover blacked-out text has its limitations. Heavy application of black marker can render text irretrievable, as the ink may completely obscure the underlying details. Even with advanced editing techniques, some information remains permanently hidden.
Photo editing is not a foolproof method for revealing redacted text. The success largely depends on the original quality of the redaction.
Here are some common limitations encountered when trying to reveal text:
- The thickness of the marker layer
- The resolution of the original image
- The extent to which the text has been obscured
Understanding these constraints is crucial for setting realistic expectations about what can be achieved through photo editing.
Techniques to Uncover Hidden Text in Screenshots
Increasing Exposure and Brilliance
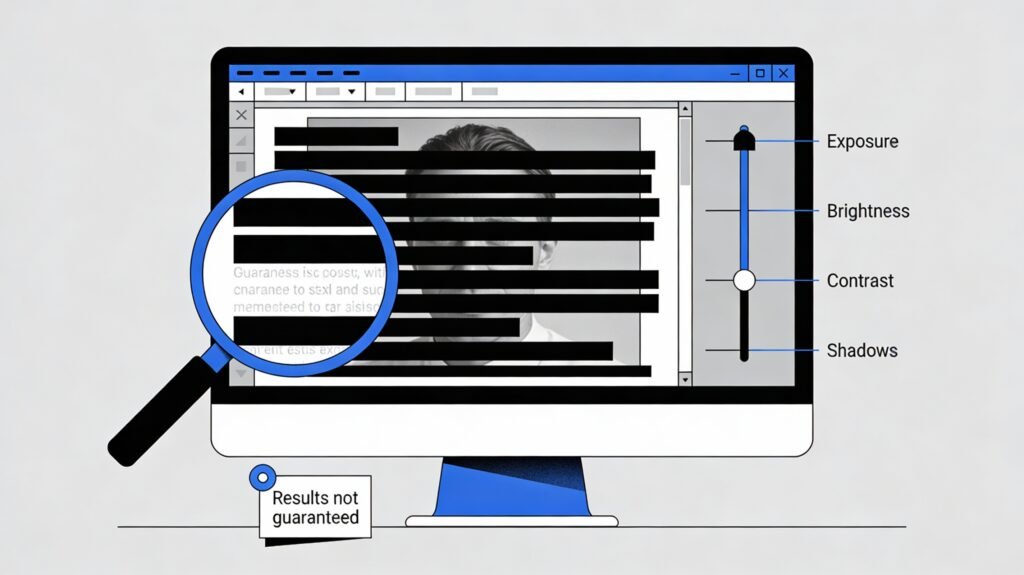
To diminish the opacity of a blacked-out layer, adjustments to the image’s exposure and brilliance are essential. By increasing the exposure, the overall brightness of the image is enhanced, which can make the darkened areas less intense and potentially reveal the text underneath. Similarly, adjusting the brilliance can modify the shadows and highlights, providing a chance to expose details that were previously obscured.
When attempting to read covered text in a screenshot, it’s crucial to push the brightness, highlights, and brilliance values to their maximum. This can often make the difference between seeing the hidden text or not.
Here’s a quick guide to the settings you might want to tweak:
- Exposure: Increase to brighten the image.
- Brilliance: Increase to adjust shadows and highlights.
- Contrast: Decrease to soften the difference between the marker and underlying text.
- Shadows: Increase to lighten dark areas and reveal hidden details.
Remember, the effectiveness of these adjustments can vary depending on the quality of the original image and the thickness of the marker used. It’s advisable to start with the highest quality image available and to experiment with the settings to find the optimal combination for your specific case.
Altering Contrast and Shadows
When attempting to uncover blacked-out text in screenshots, adjusting the contrast and shadows can be particularly effective. Reducing the contrast helps to minimize the stark difference between the blacked-out areas and the underlying text, making it easier to discern hidden details. Conversely, increasing the shadows can brighten the darker regions, potentially revealing the obscured text.
By carefully manipulating these settings, you may be able to make the redacted text more legible without compromising the integrity of the surrounding image.
Here’s a quick reference for the settings adjustments:
- Contrast: Decrease to reduce the difference between dark and light areas.
- Shadows: Increase to lighten the blacked-out sections.
Remember, the success of these techniques can vary based on the original quality of the image and the extent of the marker’s coverage. It’s often a process of trial and error to find the right balance that brings the concealed text to light.
Advanced Tools: Using Curves for Precision
When the basic adjustments of exposure, brilliance, and contrast are not enough to uncover blacked-out text, the Curves tool offers a more nuanced approach. This feature allows for precise control over the tonality and contrast of an image at various brightness levels. By manipulating the curve, you can target specific tones—lightening or darkening them—to reveal details that are otherwise obscured.
The Curves tool can be particularly effective when dealing with images that have been heavily redacted. It enables the editor to make adjustments to very specific parts of the tonal range, which can sometimes bring out the underlying text.
To get started with the Curves tool, follow these general steps:
- Open the image in your photo editing software.
- Locate the Curves tool, often found in the adjustments menu.
- Create a point on the curve and drag it to adjust the brightness of a particular tone.
- Experiment with adding multiple points to fine-tune the image.
- Preview the changes and adjust as necessary until the hidden text becomes more visible.
Using Third-Party Apps to Reveal Hidden Information
Downloading and Utilizing Photo Editing Apps
To reveal hidden details in images with blacked-out text, downloading a robust photo editing app is essential. PhotoDirector is a popular choice among iPhone and Android users for its ability to remove text from images effectively. Here’s a simple guide to get started:
- Download a photo editing app like PhotoDirector from the App Store.
- Open the app and import the photo containing the blacked-out text.
- Utilize the app’s advanced tools, such as Curves, to adjust the lighting and reveal the underlying text.
- Experiment with different settings to see which provides the best clarity for the obscured content.
While built-in iOS tools offer basic editing capabilities, third-party apps like Snapseed and Fotor provide a more granular level of control, allowing for precise adjustments that can make all the difference when trying to uncover redacted information.
Step-by-Step Guide to Using Snapseed
Snapseed, a powerful photo editing app available on the App Store, can be a game-changer when trying to uncover blacked-out text. Download Snapseed and import the photo you wish to edit. The app offers a range of advanced tools, including the Curves feature, which allows for precise control over the lighting and color levels in your image.
To begin, follow these simple steps:
- Open Snapseed and tap on ‘Open’ to import your photo.
- Select the ‘Tools’ option and choose ‘Curves’.
- Carefully adjust the curve points to manipulate the lighting and reveal the hidden text.
- Experiment with different settings, as each photo may require a unique approach.
While Snapseed provides a robust set of features, it’s important to approach the editing process with patience. Subtle adjustments can sometimes make a significant difference in revealing obscured information.
Remember, the effectiveness of these techniques can vary depending on the original quality of the photo and the extent of the black marker coverage.
Exploring Alternative Apps for Enhanced Results
Beyond Snapseed, a plethora of third-party photo editing apps are available to tackle the challenge of uncovering blacked-out text. These apps often come with advanced features that can make a significant difference in the results.
For instance, Photoshop Express offers a comprehensive suite of editing tools that can be particularly useful for redaction tasks. Similarly, apps like VSCO and Lightroom provide users with a range of filters and fine-tuning options to improve image clarity and detail.
When selecting an app, consider the following:
- The app’s ability to handle layers and masks
- Availability of advanced editing tools like curves and selective adjustments
- User reviews and ratings for redaction effectiveness
While no app can guarantee the complete recovery of redacted information, the right tool can greatly enhance the chances of revealing obscured text.
Protecting Sensitive Information on iPhone Images
Best Practices for Redacting Text
When redacting sensitive information from images on your iPhone, it’s crucial to ensure the text is completely obscured. Use solid colors and avoid translucent markers when blocking out text to prevent any chance of the information being uncovered. Here are some best practices:
- Always use the highest opacity setting available in your editing tool.
- Cover the text thoroughly, extending beyond the edges of the letters.
- Test the redaction by adjusting photo settings to confirm the text remains hidden.
While the iPhone’s editing tools are powerful, they are not foolproof. Proper redaction requires attention to detail and an understanding of how editing tools can potentially reveal hidden information.
It’s also advisable to avoid using the same color as the background of the text, as this can sometimes be manipulated to reveal the information. Instead, opt for a contrasting color that ensures the text is indistinguishable from the redaction.
Understanding the Limits of Black Marker Edits
While photo editing can reveal underlying content, it’s important to recognize the limitations when dealing with black marker edits. The effectiveness of revealing text depends on factors such as the opacity of the ink and the method used to apply it. For instance, a thick, opaque layer of marker is less likely to yield results than a lighter application.
Enhanced screen visibility leads to improved user experience, especially when viewing obscured content.
Here are some adjustments that might help in uncovering text:
- Exposure: Increase to brighten the image.
- Brilliance: Adjust to affect shadows and highlights.
- Contrast: Reduce to decrease the difference between the marker and underlying text.
- Shadows: Increase to lighten dark areas.
However, these techniques are not foolproof and should be applied with the understanding that some information may remain concealed.
Ensuring Privacy with Secure Editing Techniques
While photo editing on an iPhone can sometimes reveal hidden text, using secure redaction methods is crucial to maintain privacy. Always use solid colors and fill tools to ensure that obscured information cannot be uncovered. Here are some secure editing techniques:
- Utilize the iPhone’s Markup Editor to apply solid color overlays.
- Avoid using translucent brushes or effects that can be manipulated.
- Confirm the redaction by checking the edited image at different brightness and contrast settings.
When sharing images containing personal information, it’s imperative to verify that all sensitive data is thoroughly obscured and cannot be retrieved through editing.
Understanding the capabilities of photo editing tools is essential for effective redaction. By following these secure techniques, you can confidently share images without risking exposure of personal details.
Can You Completely Remove Marker Edits?
The ability to completely remove marker edits from a screenshot is generally not feasible. Once a photo has been permanently altered with a black marker, the obscured information is typically irretrievable. However, certain techniques can be employed to attempt revealing some of the hidden text.
While adjusting settings like brightness and contrast may provide a glimpse into what’s beneath the marker, the success of these methods varies and is not guaranteed.
Here are some settings you might adjust in an effort to uncover obscured text:
- Brightness
- Exposure
- Contrast
It’s important to note that these adjustments are more about enhancing visibility rather than completely removing the marker edits. The extent to which obscured text can be revealed depends on factors such as the thickness of the marker used and the original quality of the image.
Techniques for Uncovering Obscured Text
When attempting to uncover obscured text in iPhone screenshots, certain photo editing techniques can be surprisingly effective. Adjusting the photo’s brightness, exposure, and contrast may reveal text that was covered by a marker. However, the success of these methods can vary based on the original redaction’s thoroughness.
Enhanced screen visibility leads to improved user experience, especially when viewing obscured content. Precise adjustments in photo editing can sometimes reveal underlying content that was not adequately concealed.
Here are some steps to consider when trying to uncover obscured text:
- Increase the exposure to brighten the image.
- Adjust the contrast to differentiate the text from the background.
- Experiment with the highlights and shadows to bring out hidden details.
It’s important to note that these techniques are not foolproof and the ability to reveal redacted text depends on how the information was originally obscured.
Maintaining Data Security While Editing Images
In the digital age, safeguarding personal information is paramount, particularly when sharing images containing sensitive data. Editing techniques can inadvertently expose blacked-out text, so it’s crucial to employ secure methods for redaction.
Effective image redaction ensures compliance with data protection regulations and prevents unauthorized disclosure. When obscuring details like credit card numbers or addresses, it’s essential to understand the capabilities and limitations of your iPhone’s editing tools.
While some adjustments may reveal hidden text, others can securely conceal it, maintaining the integrity of your privacy.
Here are a few tips to keep in mind:
- Use the iPhone’s markup tools judiciously, ensuring that sensitive information is thoroughly obscured.
- Test the redaction by adjusting image settings to confirm that the covered text remains unrevealed.
Familiarize yourself with the various editing options available to better understand how to protect your data.
Advanced Techniques for Uncovering Blacked Out Text
Digital Forensics
For those with a more advanced skill set, digital forensics tools like Foremost or PhotoRec can be invaluable resources for uncovering blacked-out text. These tools are designed to recover lost or hidden data from digital devices, including images and documents.You can sometimes recover faint, poorly hidden, or partially lost text by employing advanced algorithms and techniques, but properly removed content remains unrecoverable.”
AI-Powered Solutions
In cutting-edge technology, artificial intelligence (AI) can also be a powerful tool for uncovering blacked-out text. Tools like Deep Dream Generator or InPaint utilize AI algorithms to analyze and reconstruct images, potentially making obscured text more legible when traces still exist in the image. These tools enhance and reconstruct visible patterns; they cannot recreate text that has been completely removed. While not always foolproof, these AI-powered solutions can offer innovative approaches to text decryption.
Best 5 apps & Tools for Unblurring and Sharpening Text in Images

When dealing with blurred text images, various tools can help restore clarity and readability. Here’s a rundown of effective online and software tools designed for enhancing text visibility:
Online Tools
- Media.io Image Sharpener
- Function: Enhances image sharpness and clarity by adjusting contrast, sharpness, and reducing blur. Ideal for improving the legibility of text.
- Fotor
- Function: Offers an online sharpening tool to adjust sharpness and clarity. Includes filters and effects to boost text visibility.
- PineTools
- Function: Provides a simple sharpening tool for increasing text clarity and detail in images. Users can control the level of sharpening applied.
- Enhance.Pho.to
- Function: Automatically enhances images by adjusting sharpness, contrast, and brightness. Includes noise reduction and correction features.
- LunaPic
- Function: Offers a range of editing tools including sharpening and contrast adjustments. Useful for enhancing text readability in blurred images.
Software Tools
- Adobe Photoshop
- Function: Advanced image editing software featuring sharpening filters like Smart Sharpen and Unsharp Mask. Allows precise control over image sharpness and detail.
- GIMP (GNU Image Manipulation Program)
- Function: Free and open-source editor with sharpening filters such as Unsharp Mask and High Pass filter. Enables detailed adjustments to improve text clarity.
- Topaz Sharpen AI
- Function: AI-powered tool that enhances image sharpness and reduces blur. Effective for restoring details and improving text readability.
- Luminar AI
- Function: Utilizes artificial intelligence for photo enhancement, including sharpening and detail improvement. Provides various adjustment options to enhance text clarity.
Considerations
- Image Quality: The effectiveness of these tools can vary depending on the extent of the blur and the quality of the original image. Severe blurring might not be fully reversible.
- File Formats: Some tools may perform better with specific file formats, so using high-resolution images can yield the best results.
By leveraging these tools, you can significantly improve the readability of text in blurred images, making it easier to access and utilize important information.
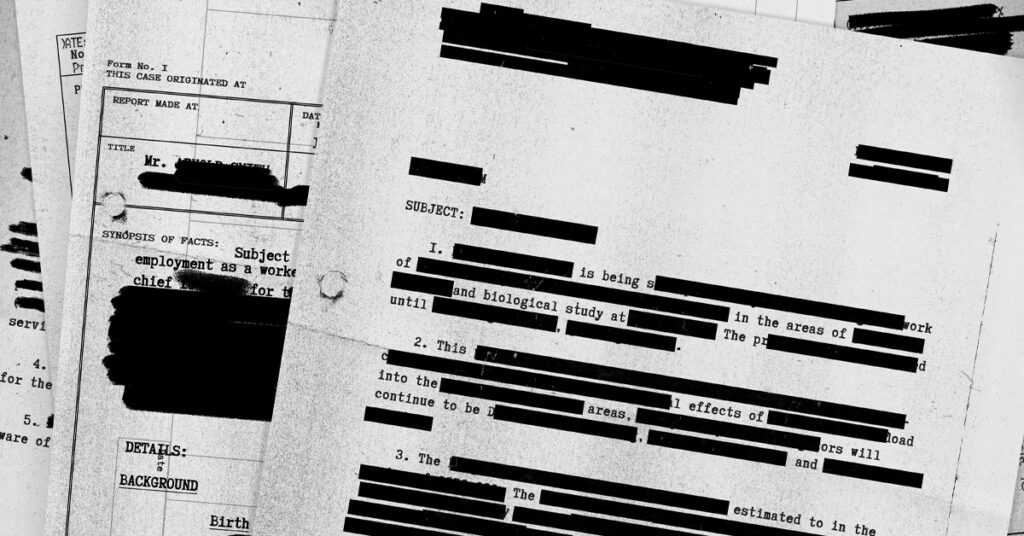
Real-Life Examples of Uncovering Blacked Out Text
Historical Revelations
Researchers and historians have uncovered previously blacked-out text in documents, revealing crucial details about significant events or figures. These discoveries have reshaped our understanding of the past and provided new insights into historical narratives.
Journalistic Investigations
 blacked out text
In journalism, uncovering blacked-out text can be a powerful tool for investigative reporting. Journalists often encounter redacted or censored documents in their investigations, but through diligent research and analysis, they can uncover hidden information and expose wrongdoing or corruption.
Conclusion
In conclusion, while it may not always be possible to completely remove or see through black marker edits on photos, the iPhone offers a suite of editing tools that can sometimes reveal obscured text. Techniques such as adjusting exposure, brilliance, contrast, and shadows can be effective in uncovering hidden information. However, it’s important to remember that the success of these methods depends on the extent of the original redaction. Users should also be mindful of privacy and the ethical implications of attempting to reveal redacted information. This article has provided insights into the capabilities of iPhone editing tools, but it also underscores the need for secure redaction methods to protect sensitive data.
Here’s an updated, tighter FAQ with a few new questions and clearer, 2025‑accurate answers. You can replace your current block with this.
Frequently Asked Questions
What methods can reveal blacked‑out text in a screenshot on iPhone?
You can try adjusting image settings such as exposure, brilliance, contrast, and shadows to brighten the screenshot and reduce the contrast between the marker and the text, which may make lightly covered text more visible. These methods only work when the digital marker or highlighter was not fully opaque to begin with.
Is it possible to see through black marker in photos on iOS devices?
Sometimes. iOS photo editing tools can alter brightness, contrast, and shadows, which may reveal text under semi‑transparent or poorly applied digital marker strokes, especially when created with iOS Markup. Truly opaque, flattened black areas cannot be reversed this way.
Can I remove marker edits from a photo that was sent to me on an iPhone?
You cannot “remove” solid marker to restore original pixels, but you can sometimes reveal hints of text if the marker was low‑opacity and the image still contains tonal information underneath. If the photo was saved with a fully opaque overlay, the original content is usually gone.
Are there any techniques for uncovering obscured text on an iPhone screenshot?
Yes. Increasing exposure and brilliance, lowering contrast, and lifting shadows can make faint text under semi‑transparent digital marker more legible. Results vary widely and will fail if the screenshot was properly redacted with solid fills.
What are the main photo‑editing settings I can manipulate to reveal text behind a black marker?
The most useful settings are exposure (overall brightness), brilliance (shadows and mid‑tones), contrast (difference between dark and light areas), and shadows (brightness of dark regions). Each can help amplify faint differences between the marker and the underlying text.
How can I ensure privacy is maintained when editing images to protect sensitive data on an iPhone?
Use solid, 100% opacity tools (pen or filled shapes), not the semi‑transparent highlighter, and cover slightly beyond the text edges. Then export the result as a new, flattened image and test your own redactions by adjusting brightness and contrast to confirm nothing becomes visible.
Is it legal to uncover blacked‑out text?
It depends on the context, the document’s ownership, and your authorization. Attempting to reveal redacted information in confidential, classified, or private documents can violate privacy laws, contracts, or regulations, so always consider the legal and ethical implications first.
Can I use AI‑powered tools for uncovering blacked‑out text?
AI‑powered tools can sometimes enhance low‑contrast or poorly redacted areas by amplifying subtle patterns in the pixels, but they cannot recreate text that has been completely removed or covered by a truly opaque mask. They should be used responsibly and only on content you are allowed to analyze.
What are the risks of uncovering blacked‑out text?
Doing so without authorization can expose sensitive personal or business data, breach privacy or confidentiality agreements, and in some cases create legal liability. It may also unintentionally reveal information about third parties who never consented to disclosure.
What other methods exist on Android besides copying and pasting blacked‑out text?
Beyond copy‑and‑paste (which only works when the text is still live under a visual overlay), Android users can try OCR apps to read faint text in images and adjust brightness/contrast in photo editors. These methods are hit‑or‑miss and will not work against fully opaque, flattened redactions.
How effective are AI‑powered solutions for uncovering blacked‑out text?
They can be effective on low‑quality or sloppily redacted images where traces of the text remain, but they struggle with complex layouts, heavy obfuscation, or low‑resolution files. AI cannot recover information that is no longer present in the image or document.
Are there limitations to using OCR tools for uncovering hidden text in PDFs?
Yes. OCR can only recognize what is at least partially visible in the scanned image. If text is completely hidden under a solid black box, or if the scan is low quality, noisy, or distorted, OCR may fail to recover it or may misread characters.
What precautions should I take when sharing redacted screenshots to avoid exposing sensitive text?
Avoid semi‑transparent brushes and scribbles. Use solid blocks or stickers at full opacity, export a new flattened image, and then test with brightness/contrast edits. Never rely solely on in‑app social media filters to hide sensitive data.
Can editing software like Photoshop reveal blacked‑out text in images?
Photoshop and similar tools can adjust levels, curves, and contrast to make faint, partially hidden text more visible, but they cannot reveal content that has been fully overwritten or removed. Their success depends entirely on how the redaction was originally applied.
Are there any apps specifically designed to uncover hidden or redacted text?
There are no mainstream consumer apps marketed solely for “breaking” redactions. Instead, people typically use general photo editors, OCR apps, and forensic tools to enhance or extract text where some visual information still exists.
What role does image resolution play in uncovering obscured text?
Higher resolution images preserve more detail and subtle tonal differences, making it easier to enhance or OCR faint text. Low‑resolution or heavily compressed images often lose that detail, making recovery attempts far less effective.
How can I permanently hide sensitive information in images?
Use redaction tools that overwrite the content, such as solid shapes or blurs at 100% opacity, and then export the result as a new file. For documents and PDFs, use proper redaction features that remove the underlying text layer instead of only covering it visually.
Can adjusting photo filters on social media apps reveal hidden text?
Yes, some filters adjust brightness, contrast, and shadows in ways that accidentally make poorly hidden text more readable. For truly sensitive information, never rely on social‑media editing tools for redaction; redact before uploading.